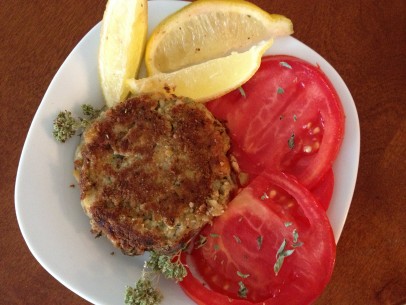
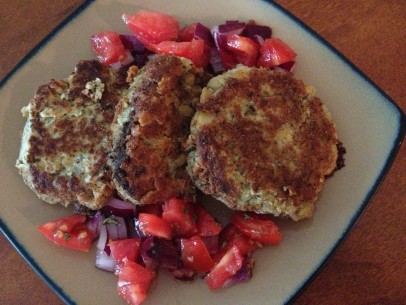
So satisfying, crispy, ‘meaty’ and aromatic with so many ways to enjoy these traditional chickpea fritters you’ll find them well worth the bit of extra effort. Revithokeftedes are perfect with a side of horiatiko chopped salad or wrapped up in pita bread with tahini lemon sauce and sliced tomatoes – chickpea fritters are a winner every time!
This scrumptious recipe takes about 4 hours total to make and because its often difficult to carve out that much time in the kitchen, I often make it in stages. The most labor intensive (and my favorite!) part is getting the skins off the chickpea and I’ll share my speedy technique so you can make quick work of it.
For this recipe, I’m putting the cooking instructions before the list of ingredients. Its a bit of a detailed process so I suggest you do a quick read through before taking the plunge here.
Soak dried chickpeas overnight or for anywhere from 6-8 hours. Soak them in a large pot and make sure chickpeas are covered with at least 2 inches of water.
After soaking, cover soaked chickpeas with at least 3-4 inches of water and bring to a rolling boil. I often add a crushed clove or two of raw garlic and perhaps a few sprigs of thyme along with a pinch of salt to season the chickpeas a bit.
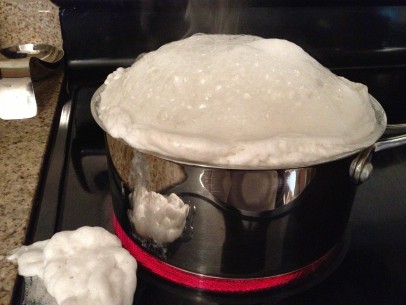
A fluffy, stiff white foam will cover the surface of the water. Skim the foam off, lower the heat to a simmer and cook for 2 hours. Check the water level every half hour and make sure there is always at least an inch of water covering the cooking chickpeas. Stir every half hour also. You’ll know the chickpeas are close to done when the skins start coming away from the chickpeas after stirring.
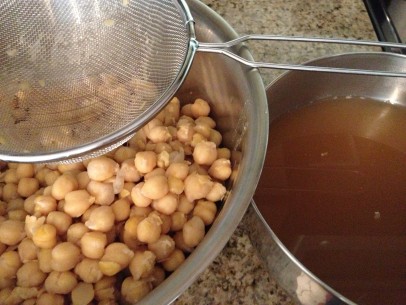
Drain cooked chickpeas and save the cooking liquid. You’ll use a few tablespoons for this recipe and you can keep the rest to add to vegetable stock. It’s too good to waste!
You can pause here if needed and pick up the recipe up to a day later. Keep chickpeas covered and refrigerated until you’re ready to move to the next step.
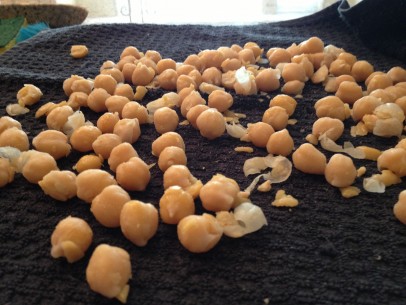
Spread chickpeas out on a clean dishtowel and allow the chickpeas to cool until you’re able to handle them comfortably. While waiting for them to cool, take a second towel and give the chickpeas a good rub. This will help to loosen the skins. Once they’re cool enough, simply take one chickpea at a time and pinch them between your thumb and forefinger.
And this may sound a little odd but I can really get into a zen place popping chickpeas out of their skins. I often wait until bedtime, tuck an old movie into the DVD player, sit with the bowl of chickpeas in my lap and pop, pop, pop.
The skin should slide right off and, yes, it’s a time consuming process but well-worth the effort, I promise! This step is essential to a smooth, silky chickpea batter.
You can pause here if needed and pick up the recipe up to a day later. Keep peeled chickpeas covered and refrigerated until you’re ready to move to the next step.
Gently sweat (cook on very low heat in covered saucepan for 10-15) onions and garlic in 2 tbsp of olive oil until tender and translucent. Set aside.
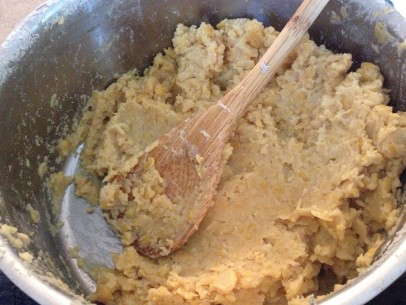
Once peeled, in a medium pot, add 2 tbsp of reserved cooking liquid back to the chickpeas and cook, covered, over low heat for about 10 minutes until the chickpeas are warmed and the liquid is absorbed. Remove from the heat and gently mash softened chickpeas with a fork or back of wooden spoon. This should take only a minute or two. Don’t be tempted to use a food processor or immersion blender, the results just aren’t as good. If there are children in your kitchen, invite them to dig right in with their hands and mash to their hearts content – it’s one of my best childhood cooking memories!
Add mashed potatoes and onion/garlic to the chickpea mixture and combine well. You can choose your desired smoothness in this step. I like mine with a few chunky pieces of chickpeas for a bit of texture but its equally as delicious when completely smooth. Mix in the freshly ground herbs/spices until completely and evenly incorporated.
Some recipes use flour (all purpose or chickpea) to soak up some of the moisture in the batter but I much prefer to use potatoes. They make the fritters that much more filling and without the raw flour taste. Make sure you salt the potatoes as they’re boiling, otherwise leave them unseasoned. They’ll take all the delicious flavors of your herbs and spices right in.
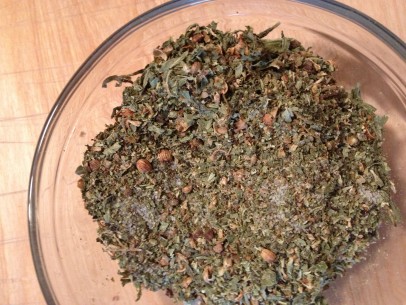
Combine spices in spice grinder or, my preference, with a mortar and pestle and grind them well. By grinding them together, they will disperse more evenly in the chickpea batter. Whenever possible, try to use whole peppercorns and coriander seeds. The difference is amazing.
Once the spices have been incorporated, I recommend setting the mixture aside to rest for 30 minutes.
You can pause here if needed and pick up the recipe up to 4 days later. Keep chickpea batter covered and refrigerated until you’re ready to move to the next step.
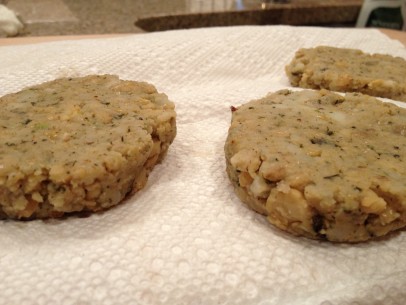
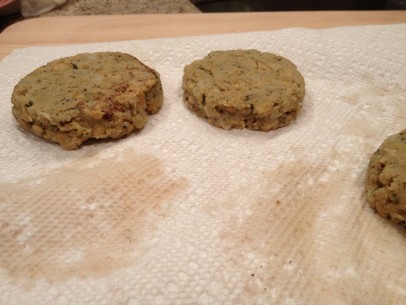
A quick, easy way to measure and shape your fritter patties is simply to use a flour measuring scoop. This helps to keep the size and shape of your patties consistent which allows you to cook all patties in a batch for the same amount of time. I use a 1/3 cup scoop of batter for each fritter. Fill your scoop, level off the top and turn it out right onto a paper towel lined cooking sheet or cutting board. Lightly pat the mound into a 1/2 inch patty and let the patties rest for 15 minutes on each side. I measure out and shape all patties in two batches of 6-10 each time. That way I’m not twiddling my thumbs waiting for them to be ready to fry.
After flipping, you’ll see that the patties leave a bit of liquid behind on the paper towel. This step is imperative for a crispy fritter. There’s no need to dredge the patties in flour, your patties should stay intact and you’ll be able to use less oil when frying.
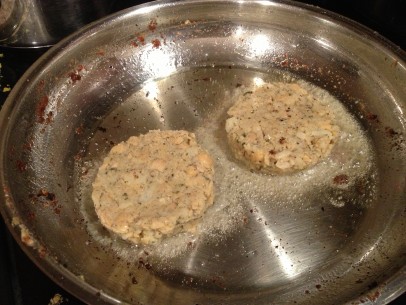
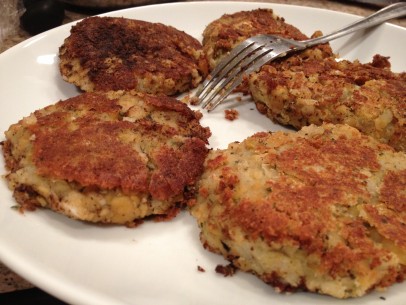
I suggest frying 2 or at most 3 patties in a ten inch, low sided frying pan. Use about 2-3 tablespoons of olive oil per batch and fry until patties are gold brown and crispy, about 5 minutes per side over medium low heat.
Be sure to wipe out pan with a paper towel between each batch to remove the crispy pieces left behind which can burn and smoke, leaving you with acrid tasting oil. Keep the number of patties to a minimum even if it takes a bit longer to cook them all. The more patties you try to cook at once the less crispy and held together they’ll be in the end.
And be careful when flipping your patties in the pan, make sure to do so gently. Continue to be careful when removing them from the pan to cool. They’re delicate until they cool a bit so handle with care!
This should yield between about 6 cups of batter and I get anywhere from 18-20 patties using the 1/3 cup per patty scoop.
You can also choose to deep fry your fritters. If you’d like to try this variation, shape your chickpea batter like you would small meatballs. Allow them to rest on a paper towel lined baking sheet before frying.
Try them drizzled with tahini lemon sauce in pita bread like falafel but so much more delicious!
And remember, you can cook up a batch and keep your batter cover in the fridge for up to 4-5 days. Before frying, allow the batter to sit outside of the fridge for about 30 minutes for best results.
Ingredients
- 5 cups cooked chickpeas (1 bag dried chickpeas)
- 2 tbsp reserved cooking liquid from chickpeas
- 1 cup chopped onions
- 1/2 cup chopped garlic
- 2 cups mashed, boiled potatoes (peeled)
- olive oil for frying
- 1 tsp salt, 1 tsp black peppercorns, 2 tsp coriander seeds, 2 tbsp dried mint, 2 tbsp dried oregano
(crush herbs and spices together in mortar and pest to combine all the flavors together evenly)


Can you use sweet potatoes in place of regular potatoes?
Hi! I don’t know that you can substitute sweet potatoes in this recipe. I’ve never tried it myself and after taking a quick look just now, don’t see any mention of it in any of the traditional revithokeftedes recipes. In my opinion, and again this is just what I think, the sweet potatoes may add additional moisture to the finished batter as well as a change the taste significantly with their sweetness. I’d be more concerned with the additional moisture. If you find this is the case, consider adding chickpea flour to compensate. Let me know how it turns out if you try it!
can they be baked?
Hi Arlene, I’ve never tried them in the oven to be honest. Just pan fried and deep fried. If you do try them in the oven, please do let me know how it goes? I’d be interested to add the info to this post, Kiki 🙂
I cannot wait to try these. Anyone who’s favorite part is the most labor intensive step of the recipe is a friend of mine! I love falafel so this should be a good change of pace for me. Happy to discover your site! Will repost after I’ve made them. Thank u!
Two questions: Do you keep the water used for soaking the chickpeas, or do you use all-new water when you top off with 3-4 inches? Also, can you give a precise weight of the bag of store-bought chickpeas? I normally buy them in cans ( I’m embarrassed to admit) so I haven’t a clue as to how many raw chickpeas it would take to get 5 cups of cooked ones.
I am already salivating at the idea of making these patties!
Thanks!
Hi Alex! so drain off soaking liquid and cover again with new water for boiling. I’ll add that clarification above, thanks for asking 🙂 As far as the weight – I use a 16 ounce bag which gives me about 2 cups of dried beans. When they’re cooked, this gives me a bit over 6 cups of cooked chickpeas. I used the 29 ounce Eden garbazo bean cans for this recipe once and I believe it took about 2 cans of this size. Hope that helps! Kiki xx
My hubby is a diabetic any suggestions? He can’t eat mashed potatoes would riced cauliflower work do you think?
Sara, I’d hesitate to use the cauliflower here as we’re looking for the starchiness of the potato to be both filler and binder. If you are interested, I’ve made the spanakorizo (spinach and rice) perfectly with cauli-rice. Simply steam 2 cups of cauliflower florets (in food processor for less than a minute) until tender and add to the recipe at the same time and in place of the rice. Then, if you’re adding the tomato paste/1/2 cup water you’re set. If no tomato version, just add 1/2 cup of water where it’s called for in the recipe. Spana-cauli-zo as we call it is absolutely incredibly tasty and just the thing for someone carb conscious!
You can make a very similar cauli substitutions in the stuffed pepper and stuffed tomato recipes but it doesn’t work in the lahanorizo (cabbage and rice) for some reason. It’s good but not great like the others. Hope this long reply is helpful! Kiki 🙂
Hi,
Can these be cooked in an air fryer? I can’t wait to try them!
yes!