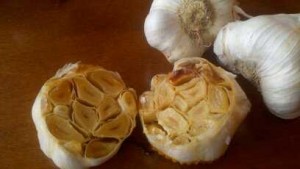
Roasting garlic in the oven brings out a buttery, nutty sweetness that is so different from raw garlic. Make a big batch at a time and you’ll have it on hand, ready to pop into your favorite recipes. Easy to cook and store, see what you think of the Greek Vegan’s no-fail garlic roasting technique!
Quick prep, easy clean up and perfectly delicious results every time – here’s the secret,muffin tins and cupcake papers. Yup. For years I used to simply wrap the head of garlic in aluminum foil and bake but consistency was always a problem with some cloves over cooked and some under. And removing roasted cloves was always sticky and messy.
Using the muffin tins, the more even heat of the pan below and aluminum foil to hold the high heat and steam in above, your garlic cooks evenly and completely without burning. Cloves just slip out of their skins and again, the cleanup is super simple. Bonus, you can roast multiple heads of garlic at once and keep them easily on hand for so many amazing recipes (a few listed below!).
Start by removing all loose outer pieces of papery skin. These can smoke quite a bit if they burn.
Then, with a sharp knife, cleanly cut off the top of your head of garlic. Keep the small pieces of raw garlic from the top to use in other recipes that call for raw garlic.
I like to use a six muffin tin and roast six heads at a time but feel free to make fewer. Don’t worry about making too many, roasted cloves in olive oil can last for weeks and you’ll find a hundred ways to use them up in no time at all. Another benefit is the delicious garlic flavored olive oil that you can pour off every few days, just remember to replace with new oil!
Line the tin with cupcake papers and place heads cut side up, one in each paper. Brush tops well with olive oil and cover pan tightly with foil. Before covering, remember to add about a tablespoon of water under one of the cupcake papers. As I mentioned earlier, it helps the garlic cloves to cook evenly and slip right out of the head after roasting.
Bake in a 400 degree oven for approximately 50 minutes until the garlic is soft to the touch and a golden color. Be careful not to overcook as burnt garlic has an extremely acrid taste. You’re looking for a soft, golden yellow color when they’re done.
Extracting the cloves is a much less sticky and stressful affair with this method too. Even so, if it’s your first time, be patient and try using a small appetizer or lobster fork to help coax them from the head while keeping cloves intact. If you don’t care so much about keeping them intact, you can gently squeeze the head but this technique take a bit of practice. My go-go is the lobster fork!
Store whole cloves in olive oil for up to 3 or 4 weeks – I like to keep them in a glass jar on the kitchen counter. It’s a great reminder to use them liberally in your cooking. You can also gently mash less than whole cloves into a paste that will keep for a week or so. Remember to add a few drops of lemon juice to preserve the color.
Delicious and so healthy just on their own spread on a piece of bread or as the key ingredient in:
- Skordalia / Garlic Smashed Potatoes
- Basil Garlic Spread
- Pasta Elias
- Melitzanosalata / Eggplant Dip
- Greek Ketchup
You’ll never run out of ways to use your roasted garlic and will find so many of your own favorites.
And remember, just throw away the cupcake papers and foil, rinse tin with soapy water and cleanup is done. Greece and roasted garlic – a love affair of epic proportion!


Never thought of using a muffin tin… perfect!